- Topic1/3
2k Popularity
6k Popularity
11k Popularity
4k Popularity
19k Popularity
- Pin
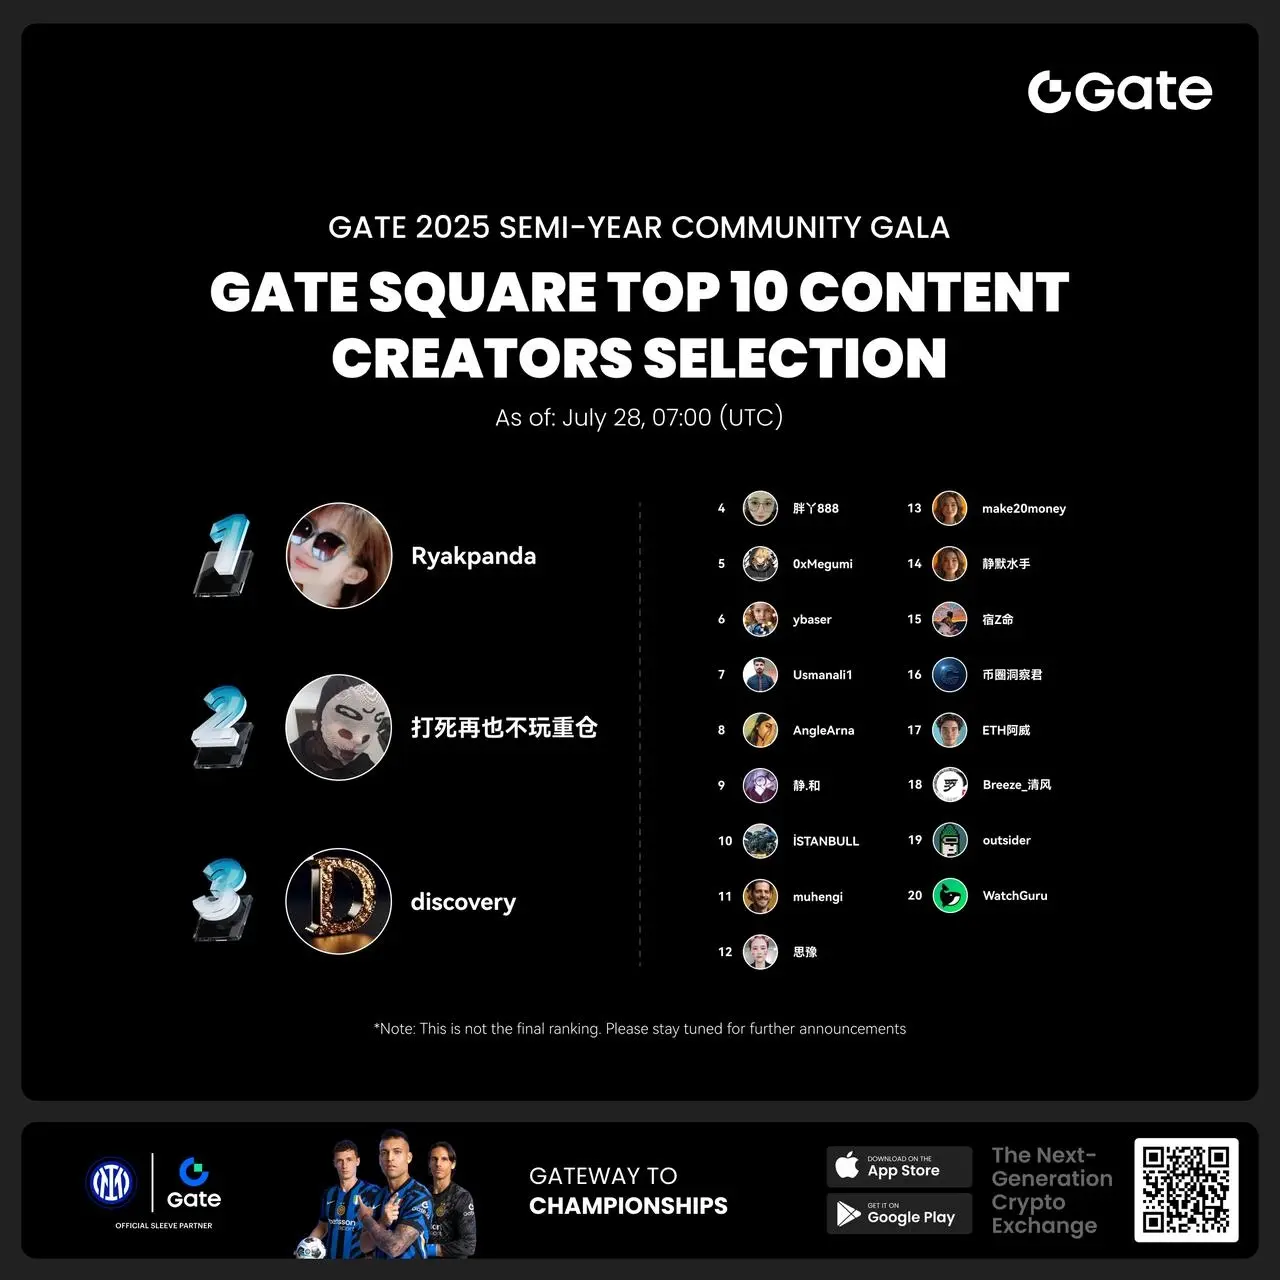
- #Gate 2025 Semi-Year Community Gala# voting is in progress! 🔥
Gate Square TOP 40 Creator Leaderboard is out
🙌 Vote to support your favorite creators: www.gate.com/activities/community-vote
Earn Votes by completing daily [Square] tasks. 30 delivered Votes = 1 lucky draw chance!
🎁 Win prizes like iPhone 16 Pro Max, Golden Bull Sculpture, Futures Voucher, and hot tokens.
The more you support, the higher your chances!
Vote to support creators now and win big!
https://www.gate.com/announcements/article/45974
- 🎉 Hey Gate Square friends! Non-stop perks and endless excitement—our hottest posting reward events are ongoing now! The more you post, the more you win. Don’t miss your exclusive goodies! 🚀
1️⃣ #ETH Hits 4800# | Market Analysis & Prediction: Boldly share your ETH predictions to showcase your insights! 10 lucky users will split a 0.1 ETH prize!
Details 👉 https://www.gate.com/post/status/12322612
2️⃣ #Creator Campaign Phase 2# |ZKWASM Topic: Share original content about ZKWASM or its trading activity on X or Gate Square to win a share of 4,000 ZKWASM!
Details 👉 https://www.gate.com/post/st
Exploration and practice of Solana NFT as an identification verification tool
Exploring the Use of Solana Token as an identification verification Tool
NFT, as a "non-fungible" token, is very suitable for use as an identification verification tool. This article will explore the feasibility of using NFT as a registration certificate through a simple example.
Introduction
Before we begin, let’s introduce the tools that will be used.
SPL Token
We can directly use the generic implementation Token Program provided by Solana without having to write a new Solana contract from scratch. The Token Program is part of the Solana Program Library(SPL), which offers multiple commonly used program implementations including Token, Swap, and Memo, and provides a complete set of client libraries, CLI tools, etc., greatly facilitating Solana developers.
Solana Playground
Solpy provides an online environment for writing and deploying Solana contracts, and by default includes some commonly used tools, such as the SPL Token introduced earlier. We can easily create and manage tokens using spl-token-cli.
Auth Token
In this section, we will create an NFT Token. If the user mints the Token, it is assumed that this wallet address is registered in the system; otherwise, prompt the user to register first.
Now, let's start with the On-chain part:
Create Token
We use spl-token to create a new token and specify it as a non-divisible Token( just like an NFT) through "--decimals".
Create Token Account
Next, we need to create a Token Account for the Token created in the previous step.
mint
Before minting a new Token to other wallet addresses, let's first try to mint a Token unit for the newly created Token Account.
We can also try to directly mint tokens to a wallet address.
is the wallet address for minting
According to the original plan, we should mint for other wallet addresses that do not belong to us. We need to first create a Token Account for the wallet address, and then use the created Token Account to mint new Token units.
In short, if we want to mint a Token unit for a certain wallet address, we must first create a Token Account for that wallet address.
Get Token Account
We need to use the RPC interface to check whether a certain wallet address has minted the NFT we created. Specifically, we will query the data using the "getTokenAccountsByOwner" method.
Implementation
Through the above attempts, we can use existing capabilities to achieve the required functionality. Next, let's start writing the client code.
We will create a simple Nextjs project to implement it, using Ant Design Web3 to Connect Wallet.
page implementation
We need three pages including the homepage, used to connect the wallet and check if the user has registered ( to mint NFT ), as well as to let the user go through the registration process to mint NFT (.
After opening the demo page, you will first see the welcome message and a link to the Sign in page. Once on the page, you need to Sign in first. Clicking "Continue with Solana" will prompt the wallet. If you haven't registered before, you will be prompted to register first.
![Web3 Beginner Series: Exploring Login with Solana Token])https://img-cdn.gateio.im/webp-social/moments-57805e7852a7ca66850a8d6b27398250.webp(
![Web3 Beginner Series: Exploring Login with Solana Token])https://img-cdn.gateio.im/webp-social/moments-14368232303f480fe96b88d4a6ba1f55.webp(
![Web3 Beginner Series: Exploring Login with Solana Token])https://img-cdn.gateio.im/webp-social/moments-ff77873087f76c412229207de916e9b9.webp(
![Web3 Beginner Series: Exploring Login with Solana Token])https://img-cdn.gateio.im/webp-social/moments-eb80585bdf5e8c2b3e3392b4bf84b693.webp(
On the Sign on page, after connecting the wallet, if successful, you will see a success message.
![Web3 Beginner Series: Exploring Login with Solana Token])https://img-cdn.gateio.im/webp-social/moments-16d560890fd229d1bb393bbc10a67f18.webp(
) transaction verification
NFTs, we can see the Mint operation that was just performed internally during sign-on as well as the minted NFT.
![Web3 Beginner Series: Exploring Login with Solana Token]###https://img-cdn.gateio.im/webp-social/moments-f7eeea08c0467dfcfc5f1c37626332ee.webp(
![Web3 Beginner Series: Exploring Login with Solana Token])https://img-cdn.gateio.im/webp-social/moments-18ae3f01f44c19832db49546fbedfe09.webp(
![Web3 Beginner Series: Exploring Login with Solana Token])https://img-cdn.gateio.im/webp-social/moments-27ab4429c1cd10ab43040def7400cc54.webp(
Summary
We created an NFT using spl-token-cli, and then determined whether a wallet address has a Token Account and has minted tokens to ascertain if it has registered on the website.
When Web3 users connect their wallets, we automatically send a sign-on request, internally create a Token Account, and mint a Token unit as proof of the user's registration.
After that, the user can log in to the website again using the same wallet address.